
Desserts
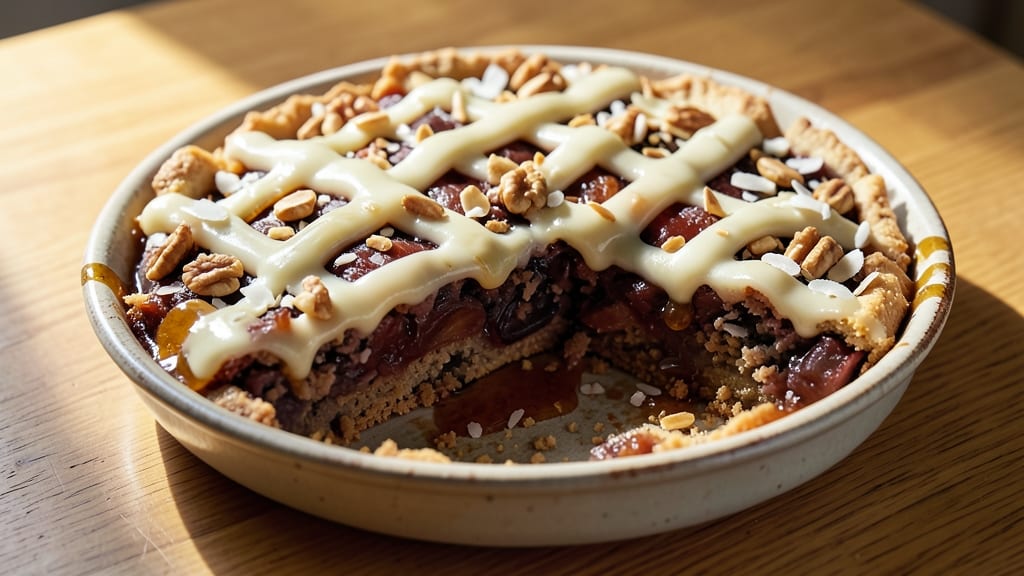
This raw vegan pie recipe redefines dessert with a nutty crust and luscious coconut filling—no baking required. 🌱 The secret lies in blending soaked nuts and dates for a sturdy yet tender crust, while coconut cream and vanilla create a velvety filling that rivals traditional pies.
Perfect for those craving something indulgent yet plant-based, this dessert delivers rich flavor without compromising dietary principles.
What sets this recipe apart is its simplicity and versatility—no oven needed, just a food processor and a little patience. The crust combines walnuts, almonds, and dates for a sturdy base, while the filling blends coconut cream, maple syrup, and vanilla for a naturally sweet, creamy texture.
It’s the ideal solution for anyone seeking a guilt-free treat that still feels decadent.
By the time you slice into this pie, you’ll uncover a creamy, fragrant center with a crisp yet tender crust—all achieved without heat. The coconut filling stays cool and velvety, while the nutty base adds a satisfying crunch.
This dessert is perfect for gatherings, special occasions, or simply satisfying a sweet tooth the healthy way.
Storage is effortless: keep it refrigerated for up to 5 days or frozen for longer shelf life. The flavors deepen over time, making it even more irresistible. Ready to bake-free indulgence? Let’s get started.
Ingredients for raw vegan pie
Six servings of plant-based indulgence—nutty crust meets velvety coconut filling without heat.
| Ingredient | Amount | Notes |
|---|---|---|
| Walnuts 🥜 | 1 ½ cups | Raw, soaked 4 hours minimum |
| Almonds 🌰 | 1 cup | Raw, lightly toasted for depth |
| Pitted Dates 🍈 | 1 cup | Medjool preferred, chopped coarse |
| Coconut Cream 🥥 | 1 can | Full-fat, chilled overnight |
| Pure Maple Syrup 🍯 | ½ cup | Grade B for molasses notes |
| Vanilla Extract 🌿 | 1 tbsp | Pure alcohol-free preferred |
| Coconut Oil 🫒 | ¼ cup | Unrefined for flavor |
| Sea Salt 🧂 | ½ tsp | Fine grain for balance |
| Lemon Juice 🍋 | 2 tbsp | Freshly squeezed |
| Ground Cinnamon 🌶️ | ½ tsp | Toasted for warmth |
| Cocoa Powder 🍫 | 2 tbsp | Raw, unsweetened |
| Filtered Water 💧 | ¼ cup | For crust binding |
The nuts form the backbone of this crust. Walnuts and almonds should be raw and high-quality—avoid pre-roasted varieties that lose their delicate flavor. Soak them 4+ hours (overnight is ideal) to soften for blending. Trader Joe's and bulk bins at natural grocery stores carry the best nuts for this recipe. Dates are non-negotiable for binding—Medjool have that perfect caramelized sweetness, but regular pitted dates work in a pinch. For the coconut cream, always use full-fat; the lighter versions won't give that luxurious texture. Chill the can overnight so the thick cream separates from the water—you only need the thick part for this recipe.
No walnuts? Cashews or pecans work in a 1:1 ratio, though texture will differ slightly. Substituting maple syrup? Agave or date syrup are direct swaps, but reduce by 10% due to their milder sweetness. The vanilla extract can be replaced with 1 tsp vanilla powder if you're avoiding alcohol, though the flavor won't be as complex. For the crust, if you don't have a food processor, a high-powered blender works—just pulse frequently to scrape down the sides. The cocoa powder adds depth without overpowering, but if you're allergic, 1 tbsp carob powder serves as a neutral substitute. Always toast your spices—toast the cinnamon in a dry pan for 1 minute before using for maximum aroma.
This pie keeps beautifully—5 days refrigerated wrapped tightly in parchment and foil, or 3 months frozen in individual slices. The crust stays crisp when chilled, but softens slightly at room temperature—perfect for serving at gatherings. For make-ahead prep, assemble the pie 24 hours before serving to let flavors meld. Store filling components separately if prepping ahead, then combine just before assembling. The lemon juice in the filling prevents browning, so don't skip it—even if you're not a citrus fan in desserts, this is the exception.
Why You'll Love This Recipe
- No-Bake Magic: I swear, this pie comes together with just a food processor and a little patience—no oven, no fuss. The walnuts and almonds blend into a crust so effortlessly, even my "I-can't-cook" brother managed it.
- Maple-Cream Dream: That coconut cream swirled into the filling? Rich, velvety, and just sweet enough to make you forget it’s vegan. The dates add this deep caramel note that ties everything together—like dessert should.
- Party in a Bowl: Serve it chilled for potlucks (it’s foolproof for make-ahead), or slice it for a quick breakfast with coffee. Honestly, I’ve eaten it for lunch, dinner, and even as a midnight snack—no judgment here.
- Budget-Friendly Luxury: Dates and nuts might seem pricey, but a batch lasts me weeks—perfect for when you’re trying to save money but still want to feel fancy. Plus, maple syrup adds that gourmet touch without breaking the bank.
Step-by-step instructions for raw vegan pie
Create a rich, creamy vegan pie with a nutty crust and luscious coconut filling.
👨🍳 Step 1: Prepare the Nutty Crust Base
In a food processor, combine the 1.5 cups walnuts and 1 cup almonds (soaked and drained). Pulse until you achieve a coarse meal texture—think breadcrumbs but with nutty chunks still visible. This texture is crucial for a sturdy crust that won't crumble.
Add the 1 cup pitted dates and process until everything sticks together when pressed. The mixture should form a dough-like consistency. If it's too dry, add 1 tablespoon of the filtered water; if too sticky, add 1 teaspoon more almonds. Press this mixture firmly into a pie dish, creating an even layer. Chill in the refrigerator for 30 minutes while you prepare the filling.
🍳 Step 2: Create the Creamy Coconut Filling
In a mixing bowl, whisk together the 1 can coconut cream (scraped from the chilled can), 0.5 cup pure maple syrup, and 1 tablespoon vanilla extract. The coconut cream should be thick and creamy—if it's too runny, chill it longer or use the thick cream from the top of the can only.
Add the 0.25 cup coconut oil and mix until fully incorporated. The mixture should be smooth and velvety. Fold in the 2 tablespoons cocoa powder, 0.5 teaspoon ground cinnamon, and 0.5 teaspoon sea salt. Stir in the 2 tablespoons lemon juice—this brightens the flavors and balances the richness. The filling should be thick but pourable; if needed, add 1-2 tablespoons filtered water to reach the right consistency.
🥘 Step 3: Assemble and Chill the Pie
Pour the coconut filling over the chilled crust, spreading it evenly to the edges. Use a spatula to smooth the top. For a decorative touch, sprinkle extra cocoa powder or a dusting of cinnamon on top. Place the pie back in the refrigerator and let it set for at least 4 hours, or ideally overnight. This chilling time is essential—it allows the filling to firm up and the flavors to meld.
Here's the thing—patience pays off. The longer it chills, the creamier the texture becomes. If you're in a hurry, you can chill it for 2 hours in the freezer, but bring it back to room temperature before serving to enjoy the best texture.
⏰ Step 4: Serve with Confidence
Once fully chilled, run a knife around the edges of the pie to loosen it from the dish. Slide it onto a serving plate and let it sit at room temperature for 10-15 minutes before slicing. This brief warm-up makes the pie easier to cut and enhances the flavors.
Slice into 6 equal portions (one per serving) and serve immediately. The crust should hold its shape, and the filling should be silky and rich with a perfect balance of sweetness and warmth. Pair with fresh berries or a dollop of coconut whipped cream for an extra touch of indulgence.
Pro Tips For Making Raw Vegan Pie
- SOAK THE NUTS FIRST: I learned this the hard way—skipping the overnight soak for walnuts and almonds leaves them chewy instead of creamy. Toss them in warm water with a pinch of salt for at least 8 hours (or overnight), then drain and rinse thoroughly before blending. Trust me, your pie crust will thank you.
- PULSE DON’T BLEND: When making the crust, pulse your soaked nuts with dates in short bursts—no more than 3-4 seconds at a time. Over-blending turns the mixture into nut butter, and you’ll end up with a dense, gummy mess instead of a light, crumbly texture. Stop when it looks like coarse sand, then add coconut cream and maple syrup to bind it.
- CHILL THE CRUST: Don’t skip letting the crust rest in the fridge for at least 30 minutes before pressing it into the pie dish. I used to rush this, and the crust would crack or shrink while baking (or in this case, dehydrating). A cold crust holds its shape better and prevents that sad, uneven collapse.
- MAPLE SYRUP ISN’T JUST SWEETENER: Use the maple syrup to hydrate the crust mixture, but don’t overdo it—too much makes the crust sticky and hard to work with. Start with 2-3 tablespoons and adjust as you go. If the dough feels dry, add a teaspoon at a time, but remember: coconut cream is your real binder here. The syrup’s job is flavor, not structure.
Serving suggestions for leftovers
Garnish Like a Pro
Top your pie with toasted coconut flakes for a tropical touch—I use unsweetened flakes from Trader Joe’s and toast them in a dry pan for 2 minutes until golden.
For a rustic look, sprinkle crushed pistachios or chopped hazelnuts over the filling. A drizzle of melted dark chocolate (70% cocoa) adds a sophisticated finish. 🌟
Fruit Pairings
Fresh berries cut through the richness beautifully. I love raspberries or blackberries for their tartness, but sliced kiwi or mango adds a tropical contrast. Arrange them artistically around the pie slices for a vibrant presentation.
For extra flair, serve with a drizzle of orange blossom water (just ½ teaspoon) over the fruit.
Whipped Cream Alternative
Skip dairy entirely with coconut whipped cream—whip ½ cup coconut cream (chilled overnight) with 1 teaspoon vanilla extract and 1 tablespoon maple syrup until fluffy. For a lighter texture, fold in 1 tablespoon aquafaba (chickpea brine). This topping elevates the pie to restaurant-quality decadence without any animal products. ✨
Warm Spiced Tea
Pair your pie with chai tea or spiced apple cider—both complement the warm cinnamon and cocoa notes. For a caffeine-free option, steep hibiscus tea with cinnamon sticks and a splash of orange juice.
The tartness balances the pie’s sweetness perfectly. Serve in small teacups for a cozy, elegant touch.
Serving Plates
Use dark slate or slate-gray plates to make the pie pop—these colors enhance the rich tones of the crust and filling. For a rustic vibe, serve on wooden boards with a scattering of edible flowers like violets or pansies.
If hosting a gathering, arrange slices on a tiered stand with mini forks for easy serving.
Make-Ahead Serving
Assemble the pie 24 hours ahead and store it in the fridge. Before serving, let it sit at room temperature for 10-15 minutes so the slices glide smoothly. For a warm-weather twist, chill the pie for 1 hour before slicing—this keeps the filling firm and prevents melting.
Wrap individual slices in parchment paper for easy transport to potlucks or picnics. 💛
Nutrition facts
Frequently asked questions
Can I make this raw vegan pie without a food processor?
While a food processor makes it easier, you can use a high-powered blender or even a mortar and pestle for the crust. For the filling, a whisk and mixing bowl will work perfectly. The key is to pulse frequently and scrape down the sides to achieve the right texture. Just be patient—it may take a few extra minutes, but the result will be just as delicious!
Why does my crust keep crumbling?
Crumbly crusts usually happen when the nuts aren't soaked long enough or the mixture is too dry. Soak your nuts for at least 4 hours (overnight is best) and add 1 tablespoon of water if the mixture feels too dry. Press it firmly into the pie dish and chill for 30 minutes before adding the filling to help it set properly.
How can I make this pie nut-free?
For a nut-free version, replace the walnuts and almonds with 1.5 cups oats (certified gluten-free if needed) and ½ cup sunflower seeds. Blend the oats first into a fine powder, then mix with the dates and a little water to bind. The texture will be slightly different but still sturdy. This works especially well if you're avoiding nuts for allergies or dietary preferences.
Can I use coconut milk instead of coconut cream?
Coconut milk won't work as well because it's much thinner and watery. The filling needs the thick, rich texture of coconut cream to hold its shape. If you only have coconut milk, you can thicken it by simmering it down (not boiling) until it reduces to a cream-like consistency, but this requires heat—which violates the raw food principle. Stick with chilled coconut cream for the best results!
Will this pie hold its shape in warm weather?
In warm climates, the coconut filling may soften more quickly. To prevent melting, chill the pie for 1 extra hour before serving, and store it in a cool place if you're not eating it immediately. For outdoor gatherings, consider serving it in a cooler with ice packs nearby. The crust stays firm, but the filling will be slightly softer—just part of the charm of this no-bake dessert!