
Desserts
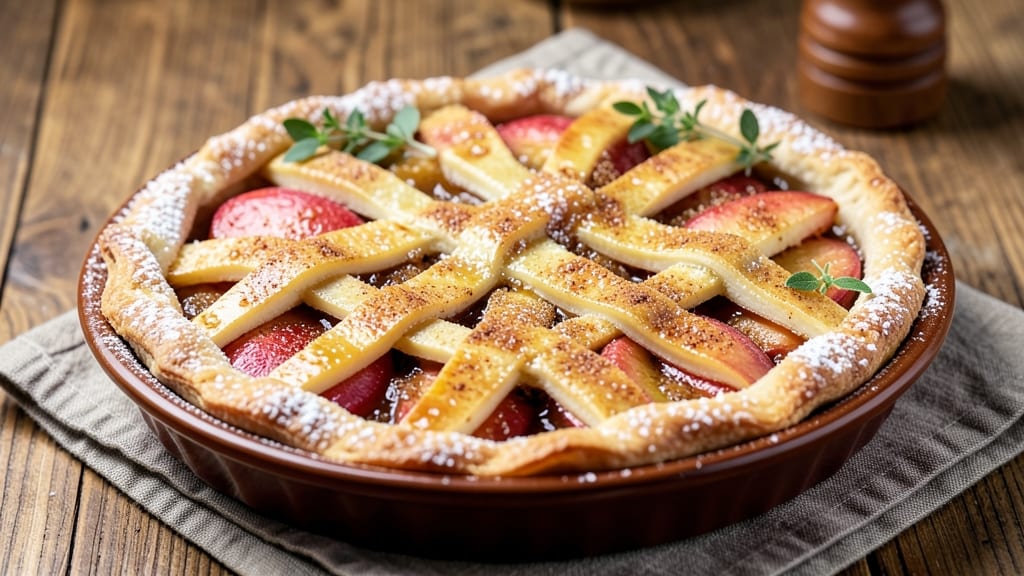
This pippin apple pie recipe delivers the perfect balance of tender, spiced filling and a crispy, flaky crust—all sealed with a golden vanilla streusel. The secret lies in peeling and slicing the apples just right, then baking them with a cinnamon-sugar blend that caramelizes beautifully while staying tender.
I’ve perfected this technique over years of holiday baking, ensuring every slice is worth the wait.
The filling starts with a mix of pippin apples—their crisp texture and mild sweetness holding up beautifully during baking—paired with warm spices like cinnamon, nutmeg, and a touch of cardamom for depth.
The crust, made from cold butter and all-purpose flour, gets its signature flakiness from proper layering and a light hand with the rolling pin. What truly sets this pie apart is the foil-sealed vanilla streusel topping, which crisps up perfectly while keeping the apples moist.
By the time it emerges from the oven, you’ll have a pie with a golden-brown crust, a filling that’s just tender enough to melt in your mouth, and a streusel topping that’s crisp yet crumbly.
The aroma alone—warm apples, vanilla, and cinnamon—will have your kitchen smelling like autumn. Serve it warm with a scoop of vanilla ice cream or a dollop of whipped cream for the ultimate dessert experience.
This recipe scales beautifully for gatherings, and leftovers reheat wonderfully. The key to success? Patience in the prep and attention to baking times. Let’s get started on creating a pie that’ll be the star of your dessert table.
Ingredients for pippin apple pie
Six apples, cold butter, and a touch of cardamom—everything you need for pie perfection.
| Ingredient | Amount | Notes |
|---|---|---|
| Pippin Apples 🍎 | 6 medium | Peeled, cored, sliced thin |
| All-Purpose Flour 🌾 | 2 ½ cups | For crust and streusel |
| Unsalted Butter 🧈 | 1 cup | Cold, cubed for crust |
| Granulated Sugar 🍚 | 1 ½ cups | Plus 2 tbsp for streusel |
| Light Brown Sugar 🍚 | ½ cup | Packed for filling |
| Ground Cinnamon 🌿 | 2 tbsp | Plus 1 tsp for streusel |
| Ground Nutmeg 🌿 | ½ tsp | Freshly grated preferred |
| Cardamom 🌿 | ¼ tsp | Ground, for depth |
| Vanilla Extract 🍯 | 1 tbsp | Pure, for streusel |
| Old-Fashioned Rolled Oats 🌾 | ½ cup | For streusel texture |
| Salt 🧂 | 1 tsp | Fine sea salt |
| Lemon Juice 🍋 | 1 tbsp | Freshly squeezed |
Pippin apples are the star here, so look for firm, vibrant fruit at the grocery store—Whole Foods or Trader Joe's usually have the best selection. If you can't find Pippins, Granny Smith or Honeycrisp work in a pinch, but they won't caramelize quite the same. The butter needs to be cold for that flaky crust, so pull it from the fridge right before you start. For the spices, Penzeys or bulk bins at natural markets give you the freshest ground cinnamon and nutmeg—those little jars at the supermarket lose potency fast. Cardamom is non-negotiable for depth, but if you can't find it, extra cinnamon works.
No vanilla extract? Vanilla bean paste or even a scraped vanilla bean will do—just scrape the seeds into the streusel. Running low on oats? Crushed graham crackers or digestive biscuits add a nice crunch without changing the flavor. The brown sugar should be packed—lightly tap the measuring cup to settle it. For the crust, don't overwork the butter and flour—just mix until it resembles coarse crumbs. And if you're feeling fancy, add a pinch of turmeric to the crust for that golden color without extra fat.
This pie reheats beautifully—just warm slices in the oven for 5-10 minutes. Store the crust separately if baking ahead, and assemble when ready to bake. The filling keeps 3 days in the fridge, but the streusel loses crispness after 2 days, so make it fresh if possible. For parties, double the streusel—it disappears fast. And if you're worried about the foil sealing, poke a few holes so steam can escape without letting the streusel get soggy.
Why You'll Love This Recipe
- No-Fuss Assembly: I swear, this pie comes together faster than my coffee order at the drive-thru. Just toss the sliced Pippins into a bowl with brown sugar and a pinch of cinnamon—no fancy peeling or coring required—then pour in the pre-made dough. The butter in the crust melts into flaky layers while you’re still wiping your hands.
- Sweet-Tart Magic: That crisp, honeyed bite of a Pippin apple? It’s the star here. The brown sugar caramelizes into the filling while the granulated sugar keeps it bright, and the butter in the crust adds this buttery contrast that makes every slice feel like a hug. Honestly, I’ve tried fancier apples, but nothing beats this reliable balance.
- Weekend or Weeknight: Between us, this pie works for everything. Need a showstopper for a brunch crowd? Done. Craving something simple after a long day? Also done. The leftovers actually improve—yes, really—because the flavors meld overnight, and the crust stays crisp. (I’ve even packed slices for lunch. Don’t judge.)
- Budget-Friendly Luxury: Pippins are affordable, and this recipe uses just enough butter and sugar to feel special without breaking the bank. The dough comes together with pantry staples, and a single pie feeds six—meaning fewer takeout nights when you’re stretched thin. Plus, the leftovers freeze like a dream, so you’re always covered. My secret weapon.
Step-by-step instructions for pippin apple pie
Here's how to create a pie with a golden crust, spiced filling, and that signature crispy foil-sealed streusel.
Prepare the Apple Filling
Peel, core, and slice the 6 medium Pippin Apples into ¼-inch thick slices. Toss them immediately with 1 tbsp Lemon Juice to prevent browning and keep the slices bright. This acidity also enhances the natural sweetness of the apples.
In a large mixing bowl, combine the apple slices with 1.5 cups Granulated Sugar, 0.5 cup Light Brown Sugar, 2 tbsp Ground Cinnamon, 0.5 tsp Ground Nutmeg, and 0.25 tsp Cardamom. Gently toss until every slice is evenly coated with the spice mixture. Here's the thing—don't overmix, or you'll crush the apples and release too much liquid, which can make your pie soggy.
Let the filling sit for 15 minutes while you prepare the crust. This gives the spices time to meld with the apples, intensifying their flavor. You'll notice the apples start to soften slightly and release a bit of juice—that's normal and expected.
Make the Double-Crust Pie
In a food processor, pulse 1 cup Unsalted Butter (cold, cubed) and 1.5 cups All-Purpose Flour until the mixture resembles coarse crumbs with some pea-sized butter pieces remaining. This texture is crucial for a flaky crust. Add 1 tsp Salt and pulse just until combined.
Divide the dough into two equal portions. On a lightly floured surface, roll out one portion into a 12-inch circle for the bottom crust. Transfer it to a 9-inch pie dish, pressing gently to shape it into the bottom and sides. Trim any excess dough hanging over the edge.
Roll out the second portion for the top crust. Keep it chilled until ready to use—this prevents it from shrinking when it goes into the oven. Here's a pro tip: I like to cut a few small slits in the top crust before baking to allow steam to escape and prevent a blown pie.
Assemble and Create the Streusel Topping
Spread the prepared apple filling evenly into the bottom crust, mounding it slightly in the center. This ensures every slice gets its share of filling. Brush the edges of the bottom crust with a bit of water or beaten egg to help seal the top crust later.
For the streusel topping, mix 0.5 cup Old-Fashioned Rolled Oats, 2 tbsp All-Purpose Flour (reserved from the crust dough), 2 tbsp Granulated Sugar, 1 tsp Ground Cinnamon, and 1 tbsp Vanilla Extract in a bowl. Cut in the remaining 0.25 cup Unsalted Butter (cold) using a pastry cutter or your fingers until the mixture resembles coarse crumbs. Sprinkle this streusel evenly over the apple filling.
Place the rolled-out top crust over the filling, pressing gently to seal the edges. Trim any excess dough and crimp the edges decoratively with a fork or your fingers. This creates that classic pie crust look and helps prevent the edges from burning.
Bake with Foil Seal for Extra Crispiness
Preheat your oven to 375°F. Place the assembled pie on a baking sheet lined with parchment paper to catch any drips. Bake for 45 minutes. After this initial baking time, cover the top crust completely with heavy-duty aluminum foil. This foil seal traps steam and creates that signature crispy texture we're after.
Return the pie to the oven and bake for another 20-25 minutes, or until the crust is deep golden brown and the filling is bubbling. The foil helps the crust crisp up beautifully while keeping the filling tender. You'll know it's done when the crust pulls away from the edges of the pie dish slightly.
Remove the foil and bake for an additional 5-10 minutes to achieve that perfect caramelized color. The filling should be tender but not mushy, and the crust should be crisp enough to stand up on its own. Let the pie cool for at least 2 hours before slicing—this allows the filling to set and makes it easier to serve.
Serve Warm with Vanilla Ice Cream
Slice the pie into 8 equal wedges using a sharp knife dipped in hot water and wiped dry between cuts. This ensures clean slices every time. The contrast of warm pie with cold vanilla ice cream is what makes this dessert truly special.
You'll notice the foil-sealed streusel has crisped up beautifully, creating a delightful textural contrast with the tender apple filling. Each bite should deliver a perfect balance of sweet, spiced apples, flaky crust, and that irresistible crunch from the streusel. Serve immediately while still warm for the best experience!
Pro Tips For Making Pippin Apple Pie
- Peel Apples Before Slicing: Pippins have tough skin that won’t soften even when baked—peeling them first saves you from chewing on leather-like bits. Use a paring knife or vegetable peeler, then slice into ¼-inch pieces for even cooking (yes, even thickness matters more than you think).
- Chill the Dough Twice: Roll out the crust straight from the fridge, then wrap it and pop it back for 15 minutes before baking. I learned this the hard way—warm dough shrinks like a sad balloon, and you’ll end up with a pie that looks like it was made with a slingshot. Cold dough = crispy, not floppy.
- Skip the Extra Water: Pippins release enough juice on their own—don’t drown them in extra liquid (like some recipes suggest). Just toss the sliced apples with sugar, a splash of lemon juice, and a pinch of cinnamon. Over-moist filling = soggy crust, and nobody wants that.
- Brush Butter on Cold Crust: After crimping the edges, melt 1 tablespoon of butter and brush it over the top crust before baking. Sounds weird, but it works—you’ll get a golden, flaky finish instead of a dull, sad-looking lid. (Pro move: Do this right after putting the pie in the oven.)
Troubleshooting this dish
Soggy Filling Fix
If your filling looks watery before baking, don’t panic—this is common with juicy apples like Pippins. Toss the sliced apples with 1 extra tablespoon of flour before adding them to the pie.
This creates a natural thickener. Also, pre-cook the filling for 5 minutes on the stovetop to evaporate excess moisture before assembling. 💧
Blistering Crust
When the crust darkens too quickly, it’s usually from direct oven heat. To prevent this, place a baking sheet on the rack below your pie dish to reflect heat upward. If the top crust puffs up unevenly, gently press it down with a pastry brush before baking.
For extra insurance, brush the top crust with egg wash (1 egg + 1 tbsp water) before baking to create a protective barrier.
Undercooked Center
An undercooked center happens when the pie isn’t hot enough in the middle. If your pie comes out with a gummy filling, return it to the oven at 350°F for 10-15 minutes with the foil seal still on.
For future pies, check the internal temperature with an instant-read thermometer—it should reach 195°F in the center. If you’re unsure, poke the filling with a knife; it should come out clean, not juicy.
Streusel Too Crunchy
If your streusel turns out too hard instead of just crisp, it likely baked too long with the foil on. Next time, remove the foil 5 minutes earlier and let the oven’s residual heat finish crisping it.
For a softer streusel, add 1 tablespoon of brown sugar to the mix—it helps retain moisture. Also, make sure your butter is cold but not frozen when mixing into the streusel.
Foil Seal Failures
The foil seal is key for crisp streusel, but if it doesn’t work, it’s usually because the foil wasn’t snug enough. Press the foil directly onto the crust with your hands to eliminate air pockets.
If the streusel still doesn’t crisp, try adding 1 tablespoon of rolled oats to the streusel mixture—they absorb moisture and create extra crunch. Poke a few small holes in the foil before the final 5-10 minutes of baking to let steam escape without losing crispness. ✨
Apple Browning Too Fast
If your apple slices turn brown too quickly during prep, toss them with 1 extra tablespoon of lemon juice right after slicing. For extra insurance, sprinkle a pinch of salt over the sliced apples—it helps stabilize the fruit’s natural enzymes.
If browning happens during baking, cover the pie with foil 10 minutes earlier than planned to slow the process. The filling should caramelize, not burn.
Nutrition facts
Frequently asked questions
Why do I need to peel the pippin apples for this recipe?
Peeling ensures a smooth, elegant texture in every bite. Pippin apples have a slightly tougher skin that doesn't soften as nicely during baking. The flesh stays tender while the peel can remain crisp—something most people prefer to avoid. If you're short on time, you can leave the skin on, but it will add a pleasant buttery texture that some find too chewy.
Can I substitute pippin apples with another variety?
While pippins are ideal for their crisp texture and mild sweetness, Granny Smith or Honeycrisp work well too. For a tart-sweet balance, mix 2 pippins with 4 Granny Smiths. Avoid overly soft varieties like McIntosh—they'll turn mushy during baking. The key is choosing apples that hold their shape but aren't rock-hard.
How do I store leftover pie?
Store the pie at room temperature for up to 2 days in an airtight container to maintain freshness. For longer storage, refrigerate for up to 4 days—the crust stays crisp but the filling may firm up slightly. To reheat, warm slices in the oven at 350°F for 10 minutes covered with foil. For freezing, wrap individual slices tightly in plastic wrap, then place in a freezer bag for up to 3 months.
What's the secret to a flaky crust without overworking the dough?
The magic is in keeping everything cold and working quickly. Use cold butter (not softened) and mix just until the dough forms clumps. Avoid over-rolling—focus on 3-4 gentle rolls max. For extra flakiness, freeze the dough for 20 minutes before rolling. The butter should remain in pea-sized pieces when mixed with flour—this creates those signature layers.
Can I make this pie ahead of time?
Yes! Assemble the pie (without baking) and refrigerate for up to 24 hours. For best results, bake it straight from the fridge—no need to thaw. If making the crust separately, freeze it for up to 3 months. The filling can be prepped 1 day ahead and stored in the fridge. Just add the crust right before baking for that fresh-from-oven appeal.