
Desserts
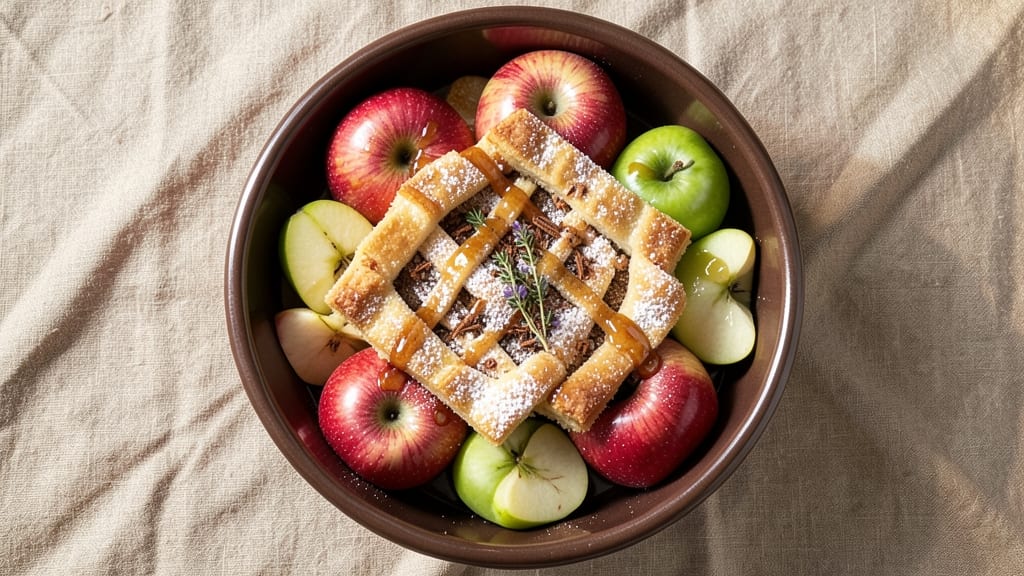
This pour-over apple pie recipe transforms classic pie-making with a foolproof technique that delivers crispy lattice crust and juicy, spiced filling every time.
The secret lies in baking the apples first, then pouring a buttery syrup over them before sealing the crust—this ensures a perfectly moist center while keeping the edges golden and flaky.
I developed this method after years of pie experiments, and it’s now my go-to for both holiday gatherings and quiet weeknight treats.
The lattice crust adds a rustic charm while allowing steam to escape, preventing a soggy bottom. You’ll start with a simple, all-butter crust rolled out and cut into strips for that signature crisscross pattern.
The filling combines tender apples (a mix of Honeycrisp and Granny Smith for balance) with cinnamon, nutmeg, and a touch of brown sugar for depth. The pour-over step—where you drizzle warm butter and syrup over the baked apples—elevates the flavor to restaurant-quality levels.
What makes this recipe stand out is its versatility. Whether you’re baking for a crowd or just craving a single slice, the pour-over technique guarantees a juicy, caramelized filling that stays moist for days. The lattice crust adds visual appeal while keeping the pie sturdy enough to slice cleanly.
Plus, the method works with vegan butter and coconut sugar for a plant-based twist—no one will guess it’s not the traditional version.
Ready in about 1 hour 30 minutes (including baking and cooling), this pie is perfect for holidays, potlucks, or whenever you need a showstopping dessert. The aroma alone will have everyone gathering around the kitchen. Let’s get baking—your taste buds (and guests) will thank you.
Ingredients for pour over apple pie
Eight ingredients for the lattice crust, eight for the filling—simple but transformative.
| Ingredient | Amount | Notes |
|---|---|---|
| Honeycrisp Apples 🍎 | 4 medium | Peeled, cored, sliced 1/4-inch thick |
| Granny Smith Apples 🍎 | 4 medium | Peeled, cored, sliced 1/4-inch thick |
| All-Purpose Flour 🌾 | 3 cups | Plus 1 tbsp for dusting |
| Unsalted Butter 🧈 | 1 cup | Cold, cubed for crust |
| Granulated Sugar 🍚 | 1 ½ cups | For filling and syrup |
| Light Brown Sugar 🍚 | ½ cup | Packed for depth of flavor |
| Ground Cinnamon 🌿 | 2 tbsp | Freshly ground preferred |
| Ground Nutmeg 🌿 | ½ tsp | Freshly grated |
| Salt 🧂 | 1 tsp | Fine sea salt |
| Lemon Juice 🍋 | 2 tbsp | Freshly squeezed |
| Vanilla Extract 🥛 | 1 tsp | Pure vanilla preferred |
| Heavy Cream 🥛 | ¼ cup | Full-fat for richness |
| Egg 🥚 | 1 large | For egg wash |
The apples are non-negotiable—Honeycrisp and Granny Smith give you that perfect balance of sweet and tart. Local farmers markets often have the best selection, but the grocery store works too—just make sure they're firm and free of bruises. I usually buy them a day ahead and store them in the fridge to let them firm up. For the crust, King Arthur flour is my go-to—it's got that high protein content that makes for a flakier crust. If you can't find it, regular all-purpose flour works fine, but you might need an extra tablespoon or two of ice water to bring it together.
No vanilla extract? Vanilla bean paste works just as well, or you can scrape seeds from a vanilla bean. Short on heavy cream? Half-and-half or whole milk** will work, but the texture won't be quite as rich. The lattice crust is where the magic happens—cutting the dough into strips and weaving them gives that classic look while letting steam escape. If you're feeling fancy, use a pizza cutter for clean lines. For a vegan twist, swap the butter for Earth Balance vegan butter** and the heavy cream for coconut cream. The apples can be pre-sliced if you're short on time, but fresh is always better.
The crust dough can be made a day ahead and kept wrapped in plastic in the fridge—24 hours max. The filling keeps well too, so you can bake the apples and syrup ahead, then assemble the pie just before baking. Once it's out of the oven, let it cool for at least 4 hours before slicing—this gives the filling time to set properly. Store leftovers in an airtight container in the fridge for up to 5 days, or freeze individual slices for up to 3 months**. The aroma alone will have everyone thinking you spent hours in the kitchen—worth every minute.
Why You'll Love This Recipe
- No-Roll Crust Struggle: I’ll never buy store-bought crust again. Three ingredients—flour, butter, sugar—mixed into a dough, pressed into a pan, and boom, golden edges without the fuss. (Yes, even on a Tuesday night.)
- Sweet-Tart Magic: Honeycrisp’s juicy bite meets Granny Smith’s sharp tang—it’s the apple duo that actually works. A sprinkle of cinnamon and sugar? That’s the cherry on top.
- Leftovers for Days: This pie keeps for weeks in the fridge (if it lasts that long). Slice it for breakfast toast, pack it in lunches, or reheat slices with vanilla ice cream—it’s the ultimate multi-purpose dessert.
- Budget-Friendly Luxury: You’re using pantry staples—flour, butter, sugar—and seasonal apples. No fancy ingredients, no waste. Honestly, it’s the kind of dessert that makes you feel fancy without breaking the bank.
Step-by-step instructions for pour-over apple pie
Here's how to craft a golden lattice crust with a juicy, spiced filling that releases its aroma the moment it hits the oven.
Prepare the Perfect Filling
Combine the peeled and sliced 4 medium Honeycrisp Apples and 4 medium Granny Smith Apples in a large bowl. The tart Granny Smith balances the sweet Honeycrisp beautifully. Sprinkle over 1.5 cups Granulated Sugar, 0.5 cup Light Brown Sugar, 2 tbsp Ground Cinnamon, 0.5 tsp Ground Nutmeg, and 1 tsp Salt. Toss gently but thoroughly to coat every slice evenly.
Drizzle in 2 tbsp Lemon Juice and 1 tsp Vanilla Extract, then fold everything together with your hands. The lemon brightens the apples while preventing browning, and the vanilla adds depth. Let the mixture sit for 15 minutes at room temperature—this allows the flavors to meld and the apples to soften slightly before baking.
Make the Crust and Assemble the Pie
In a food processor, pulse 3 cups All-Purpose Flour and 1 tsp Salt until combined. Add 1 cup cold, cubed Unsalted Butter and pulse until the mixture resembles coarse crumbs with pea-sized butter pieces. Sprinkle in 0.25 cup Heavy Cream and pulse just until the dough comes together. Turn it out onto a floured surface and gently shape into a disk. Wrap in plastic and chill for 30 minutes—this prevents shrinking during rolling.
Roll out half the dough to fit a 9-inch pie dish, leaving a 1-inch overhang. Transfer to the dish and trim the edges. Pour in the prepared apple filling, pressing down lightly to compact it. Roll out the remaining dough for the lattice top—cut it into 1-inch strips and arrange them in a herringbone pattern over the filling. Brush the lattice with beaten 1 large Egg mixed with 1 tbsp water for a golden finish.
Bake to Golden Perfection
Preheat your oven to 375°F and place a baking sheet on the lower rack to catch any drips. Bake the pie for 45-50 minutes until the lattice is deep golden brown and the filling bubbles around the edges. The crust should be crisp, not soggy—if it browns too quickly, tent loosely with foil after 30 minutes to prevent over-browning.
For the pour-over effect, remove the pie from the oven and let it cool for 10 minutes. Meanwhile, heat 0.25 cup Heavy Cream in a small saucepan until it just begins to simmer. Slowly pour the cream over the hot pie, letting it seep into the lattice and filling. Return the pie to the oven for 5-7 minutes to set the sauce. Serve warm with vanilla ice cream for the ultimate experience.
Rest and Serve for Maximum Flavor
Let the pie rest for at least 2 hours before slicing—this allows the juices to redistribute, ensuring every bite is moist and flavorful. The lattice will crisp up further as it cools, creating that perfect contrast between tender filling and crunchy crust.
Slice through the lattice strips to reveal the golden, caramelized apples beneath. The pour-over cream adds a silky richness that ties everything together. Serve with a dollop of whipped cream or a scoop of ice cream, and watch your guests savor every bite of this showstopping dessert.
Pro Tips For Making Pour Over Apple Pie
- PEEL THE GRANNY SMITHS: I learned this the hard way—leaving the skin on Granny Smiths makes the filling too tart and watery. Use a vegetable peeler to strip just the outer layer, then slice them ¼-inch thick. The Honeycrisp can keep its skin, but the Granny Smiths need this step to balance the sweetness.
- CHILL THE BUTTER FIRST: Cold butter in the crust means flakier layers. Take the unsalted butter straight from the fridge, cut it into ½-inch cubes, and toss them into the flour mixture. If it starts to melt while mixing, pop the bowl in the freezer for 5 minutes—yes, even if you're impatient like me.
- DON’T OVERMIX THE CRUST: The moment the flour-butter mix starts to clump into a shaggy dough, stop. Use your fingers to gently press it together just until it holds. Overmixing develops gluten, and that turns your crust into a tough, sad pancake instead of the delicate lattice you want. Rough edges? That’s fine—it’ll bake up better.
- BROWN THE APPLES: Toss the sliced apples with 1 tablespoon of sugar and let them sit for 10 minutes before pouring. The sugar draws out moisture, and the apples develop a subtle caramelization. Skip this, and your pie filling will taste bland and waterlogged—trust the process, even if it feels like extra work.
Essential equipment for pour over apple pie
Lattice Cutting Tools
For clean, precise lattice strips, I recommend using a pizza cutter—it glides effortlessly through chilled dough. A sharp chef’s knife works too, but you’ll need to rock it gently to avoid tearing.
I’ve tried everything from plastic pie cutters to dental floss (yes, really!), but nothing beats a West Bend pizza wheel for reliability. 🔪
Pie Dish Essentials
A 9-inch glass pie dish is my top choice—it distributes heat evenly and makes slicing a breeze. Avoid dark metal pans; they can over-brown the crust. For a rustic touch, try a ceramic dish (like Le Creuset), but monitor baking time closely.
Pro tip: Lightly butter the dish before adding dough to prevent sticking.
Mixing and Measuring
Use a food processor for the crust—it’s faster than cutting butter by hand and ensures even distribution. For the filling, a large stainless steel bowl prevents apples from browning prematurely.
I swear by King Arthur flour for the crust, but any high-protein all-purpose flour works. A microplane is perfect for grating nutmeg fresh.
Baking Tools
A baking sheet on the lower rack catches drips and keeps your oven clean. For the pour-over step, a small saucepan with a pour spout (like Cuisinart) makes heating the cream effortless. A pie cooling rack is a game-changer—it prevents soggy bottoms while the pie rests. 🍎
Optional Upgrades
Invest in a pie bird if you’re nervous about over-browning—it vents steam without letting in too much air. For lattice perfection, a lattice cutter (like Wilton’s) saves time and frustration. And trust me, a pie server with a built-in lid keeps slices warm and prevents crumbs.
Budget-Friendly Swaps
No fancy tools? A sharp knife and measuring cups work just fine. Use a wooden spoon to stir the filling, and a cooling rack can be improvised with a wire mesh. The key is patience—let the pie rest before slicing, and the results will still be stunning. 💪
Nutrition facts
Frequently asked questions
Why does this recipe use both Honeycrisp and Granny Smith apples?
The combination creates the perfect balance of flavors—Honeycrisp adds sweetness while Granny Smith brings tartness. This contrast makes the filling more complex and prevents it from being too cloying. The texture difference also adds interest, with Honeycrisp staying slightly firmer than Granny Smith as it bakes.
Can I make this pie ahead of time?
The filling and crust can be prepped separately up to 24 hours ahead. For the full pie, bake it 1 day in advance, then refrigerate. Reheat slices at 350°F for 10-15 minutes to restore crispness. The flavors actually improve after resting, especially with the pour-over technique.
What's the secret to the pour-over technique?
The magic happens when you pour warm heavy cream over the hot pie—it instantly steams the filling, creating a silky sauce that soaks into the lattice. The key is timing: let the pie cool 10 minutes after baking, then pour the cream while it's still warm. Returning it to the oven for 5-7 minutes sets the sauce perfectly.
How do I prevent a soggy bottom crust?
Use a pie cooling rack under the dish while baking to allow air circulation. Also, blind-bake the crust for 5 minutes before adding filling. The lattice design helps too—it lets steam escape while keeping the top crisp. Never skip the 2-hour cooling time before slicing!
Can I make this pie without a lattice crust?
Yes! Roll out the full crust, cut a few slits for steam, and brush with egg wash. The pour-over technique still works—just pour the cream through the slits. For a rustic look, try a crustless top or a simple egg wash drizzle instead of lattice. The filling will still be delicious!