
Desserts
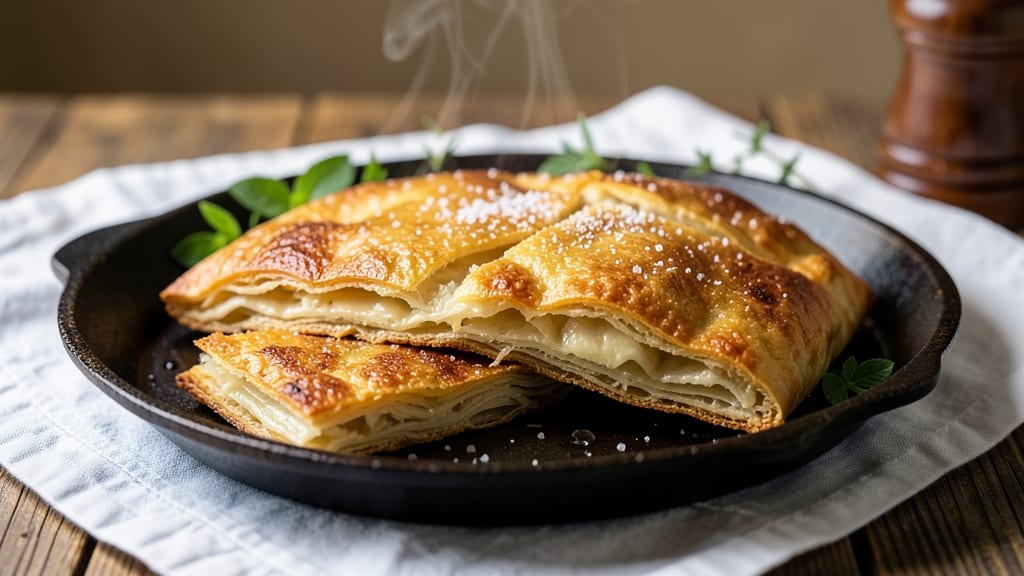
This Amish fried pie dough recipe delivers the kind of crispy, flaky perfection that makes every bite worth the effort. 🔥 The secret lies in a high-fat dough that transforms into delicate, shatteringly thin layers when fried—just like the legendary pies from Pennsylvania farm kitchens.
What makes this version special is the balance of lard and butter, which creates that signature texture while keeping the dough stable enough to handle without cracking.
The process starts with cold ingredients cut into small pieces—a technique that develops maximum flakiness through proper layering. You'll work with a simple dough that comes together in minutes but requires patience during the chilling and rolling stages.
This isn't just any fried pie dough; it's the foundation for pies that become legendary at family gatherings, church potlucks, and holiday meals.
Once fried to a golden brown, this dough becomes an edible canvas for your favorite fillings—apple, cherry, or berry—all encased in that irresistible crispy shell. The key is maintaining the right oil temperature and frying in batches to ensure even cooking.
What you'll end up with is a pie that's light enough to eat with a fork but sturdy enough to hold generous fillings without soggy bottoms.
Perfect for special occasions or when you want to impress with homemade dessert, this recipe delivers restaurant-quality results with a touch of Amish tradition. The dough can be made ahead and stored for up to three days, making it ideal for meal prep or last-minute entertaining.
Let's get started on creating pies that'll have everyone asking for seconds.
Ingredients for amish fried pie dough
This high-fat dough delivers legendary Amish-style flakiness with just seven ingredients.
| Ingredient | Amount | Notes |
|---|---|---|
| All-Purpose Flour 🌾 | 3 cups | Sifted for light texture |
| Lard, Leaf 🧈 | 1 cup | Rendered, not crumbled |
| Unsalted Butter 🧈 | ½ cup | Cold, cubed into small pieces |
| Granulated Sugar 🍚 | 2 tbsp | For subtle sweetness |
| Salt 🧂 | 1 tsp | Diamond Crystal preferred |
| Ice Water 💧 | ½ cup | Chilled, for stability |
| Vegetable Oil 🫒 | 3 cups | For frying, 350°F |
The lard and butter combo is non-negotiable for that signature shatter—lard provides stability, while butter adds flavor. Grab leaf lard from the butcher section (not the crumbly kind) and European-style butter with 82% fat for best results. Flour matters too: King Arthur or Gold Medal brands give the best structure. Keep everything cold until mixing—warm ingredients = tough dough. The sugar isn't just for sweetness; it helps tenderize the layers.
No lard? Shortening works in a pinch, but texture won't be identical. Butter substitutes? Coconut oil at room temperature mimics some fat content, though flavor differs. For salt, Diamond Crystal is ideal—it dissolves better than table salt. Ice water is critical: use just enough to hold the dough together—adding too much makes it gummy. The vegetable oil for frying should be refined, not flavored, and kept at 350°F—a candy thermometer is worth the investment here.
Dough keeps 3 days wrapped in plastic in the fridge or 3 months frozen between parchment layers. For frying, work in batches—overcrowding drops oil temp. The fried dough stays crispy for 2 hours at room temp if stored in a paper towel-lined box. Freeze extras immediately after frying to maintain crispness for up to 1 month—just reheat in a 375°F oven for 5 minutes before serving.
Why You'll Love This Recipe
- No-Fuss Mix-In: I swear by this dough—just flour, lard, and butter cut into cubes until it’s the texture of cornmeal. No food processor, no stress, and no waiting for dough to rest. Honestly, I’ve made it while chatting on the phone.
- Buttery Crunch Magic: That crispy, golden-brown edge? Pure lard and butter working together. The sugar just melts into caramelized perfection when fried, giving it this addictive sweetness that tastes like a hug from your grandma’s kitchen.
- Pie or Hand Pies: Same dough, endless uses. Fry it up for classic Amish fried pies, or roll it out for hand pies stuffed with anything from apples to sausage. I’ll be real: the first time I made mini hand pies with this, my kids stole half before dinner.
- Pantry Goldmine: Lard and butter are cheap staples, and this dough keeps for weeks in the fridge. Double the batch—it’s perfect for potlucks, church dinners, or when you just need dessert without the guilt. (Yes, even on a Tuesday night.)
Step-by-step instructions for Amish fried pie dough
This dough creates legendary flakiness—layer upon layer that practically melts in your mouth.
👨🍳 Step 1: Prepare the Fat Mixture
In a medium bowl, combine the 1 cup lard, leaf and 0.5 cup unsalted butter (still cold and cubed). Use a pastry cutter or two forks to cut the butter into the lard until you achieve pea-sized pieces—this ensures even distribution and maximum flakiness. The mixture should look like coarse crumbs with visible fat pieces.
I like to work quickly here—cold fat is key. If the mixture starts to soften, place the bowl in the freezer for 2-3 minutes to firm it back up. This prep step is where the magic begins; those fat layers will create the signature shatter when fried.
👨🍳 Step 2: Mix Dry Ingredients
In a large bowl, whisk together the 3 cups all-purpose flour, 2 tbsp granulated sugar, and 1 tsp salt. Sift the flour first if you have time—this removes lumps and ensures a lighter texture. The sugar adds just enough sweetness to complement any filling, while the salt balances flavors.
I always use Diamond Crystal salt here—it dissolves more completely than table salt. Give the dry ingredients a thorough mix so the sugar and salt are evenly distributed throughout the flour. This prevents pockets of sweetness or saltiness in your final pie.
🥘 Step 3: Combine Wet and Dry Ingredients
Add the fat mixture to the dry ingredients and use your fingers or a pastry cutter to work it in until the mixture resembles coarse crumbs with some flour still visible. This texture is crucial—it should be dry enough to hold its shape when rolled out but still have visible fat pieces.
Gradually add the 0.5 cup ice water, 1 tablespoon at a time, mixing gently with a fork or your fingers. The ice water is essential—it binds the dough without making it tough. Stop adding water as soon as the dough begins to come together. Overworking or overhydrating will destroy that delicate flakiness we're after.
🔥 Step 4: Shape and Chill the Dough
Turn the dough out onto a lightly floured surface and gently shape it into a 1-inch thick round disk. Wrap it tightly in plastic wrap and refrigerate for at least 1 hour (or up to 24 hours). This resting period allows the gluten to relax and the fat to firm up, making it easier to roll out without tearing.
Here's the thing—don't skip the chilling. I've learned the hard way that warm dough is a nightmare to work with. The cold temperature also helps prevent the fat from melting too quickly during frying, which would make your pie dough greasy instead of flaky.
🍳 Step 5: Fry to Golden Perfection
Heat 3 cups vegetable oil in a deep fryer or heavy pot to 350°F. Cut the chilled dough into 4 equal wedges (for a 9-inch pie) and fry one piece at a time, being careful not to overcrowd the pot. Fry for 2-3 minutes per side until golden brown and crispy.
You'll know it's ready when the dough floats and turns a beautiful golden color. Drain on paper towels and keep warm in a 200°F oven while you fry the remaining pieces. The key is consistency—each piece should have the same cooking time to ensure even doneness. Serve immediately for maximum crispness!
Pro Tips For Making Amish Fried Pie Dough
- Chill the Dough Properly: Wrap the dough in plastic and refrigerate for at least 2 hours—no, overnight is better. Cold dough fries more evenly and won’t shrink into a sad, greasy lump in the pan. I learned this the hard way when my first batch turned out greasy and uneven because I rushed it.
- Use Leaf Lard, Not Shortening: Leaf lard isn’t just a fancy term—it’s the real deal. The thin layers of fat in leaf lard create flakier, crispier dough than shortening or regular lard. If you can’t find it, render your own from pork fat, but don’t skip this step—it’s the thing that matters most for that classic Amish texture.
- Don’t Overwork the Dough: Mix just until the flour is mostly incorporated—stop when it looks shaggy, not smooth. Overmixing develops gluten, which makes the dough tough instead of tender. I used to panic and keep kneading, and my fried dough ended up chewy instead of light and crisp.
- Fry in Small Batches: Crowd the pan, and you’ll end up with soggy, uneven pieces. Drop in 3-4 pieces at a time, and space them out so they float freely. This keeps the oil temperature steady and guarantees golden-brown, not greasy, results. Yes, it takes longer, but it’s worth it.
Make-ahead tips for amish fried pie dough
Dough Prep Ahead
The dough can be made up to 3 days in advance and stored in the fridge, wrapped tightly in plastic wrap. I like to shape it into a disk and refrigerate it overnight—this extra chilling time makes rolling it out the next day a breeze.
For longer storage, freeze the wrapped dough for up to 3 months between parchment paper layers to prevent freezer burn. 💫
Filling Prep Tips
Prep your fillings the day before to streamline assembly. For apple fillings, I recommend peeling, coring, and slicing apples and tossing them with 1 tbsp lemon juice and 1 tbsp sugar to prevent browning.
Store in an airtight container in the fridge. Berry fillings can be mixed with 1 tbsp cornstarch and 1 tsp vanilla extract for extra flavor—keep them chilled until ready to use.
Frying in Batches
Never fry more than one piece of dough at a time—overcrowding lowers the oil temperature and leads to greasy, unevenly cooked dough. Use a candy thermometer to monitor oil temp, keeping it at 350°F between batches.
I find that 2-3 minutes per side gives the perfect golden brown finish. Work quickly to keep the oil hot and maintain crispiness. ✨
Storage for Crispy Results
Keep fried dough pieces in a paper towel-lined box at room temperature for up to 2 hours—they’ll stay crispy if not exposed to moisture. For longer storage, freeze extras immediately after frying in a single layer on a baking sheet, then transfer to a freezer bag.
Reheat frozen pieces in a 375°F oven for 5 minutes before adding fillings to restore crispness. 🔥
Make-Ahead Assembly
Assemble pies the night before serving by filling the fried dough with your prepped filling and sealing the edges with a bit of egg wash (1 egg beaten with 1 tbsp water). Wrap tightly in plastic and refrigerate.
When ready to serve, bake at 375°F for 10-12 minutes to warm through. This method keeps everything fresh and ready for a quick bake when guests arrive.
Freezer-Friendly Fillings
Some fillings freeze beautifully for make-ahead convenience. Cherry or apple fillings can be frozen in a single layer on a tray, then transferred to a freezer bag for up to 2 months.
Thaw overnight in the fridge before assembling. For custard-based fillings, bake them ahead and store in an airtight container—reheat gently before using to prevent curdling. 💡
Nutrition facts
Frequently asked questions
Can I substitute lard in this fried pie dough?
You can use shortening as a direct substitute, but texture will differ slightly. For flavor, try coconut oil (solid at room temperature) or a mix of butter and shortening (like 3/4 cup butter + 1/4 cup shortening). The lard's stability at high heat creates that signature flakiness, so avoid vegetable oils or margarine—they'll make your dough greasy instead of crisp.
Why is my fried pie dough turning out greasy instead of crispy?
Greasy dough usually means the oil was too hot (above 355°F) or the fat melted too quickly. Keep everything cold until frying, and use a candy thermometer to maintain 350°F. Also, don't overwork the dough—visible fat pieces are key! If your dough feels sticky after mixing, you likely added too much water.
What's the best way to fill Amish fried pies?
Classic options include apple (with cinnamon and brown sugar), cherry (with almond extract), or berry (with lemon zest). For extra flavor, pre-cook fillings with 1 tbsp cornstarch to thicken them. Spread filling evenly on one half of the fried dough, then fold over and seal edges with a bit of egg wash before baking at 375°F for 10-12 minutes.
Can I make this dough ahead for a large gathering?
Shape the dough into a disk, wrap tightly, and refrigerate for up to 3 days or freeze for 3 months between parchment layers. For fillings, prep components separately (like pre-cooked fruit mixtures) and store in airtight containers. Assemble pies the night before and refrigerate—just bake at 375°F for 10 minutes before serving to restore crispness.
How do I keep the fried dough from getting soggy?
Soggy dough happens when moisture from fillings seeps in. Always pre-cook fruit fillings until thickened, and use cornstarch (not flour) to stabilize them. For custard fillings, bake them separately first. After frying, store dough pieces in a paper towel-lined box at room temperature—never in plastic. Reheat fried dough in a 375°F oven for 5 minutes before adding fillings.