
Desserts
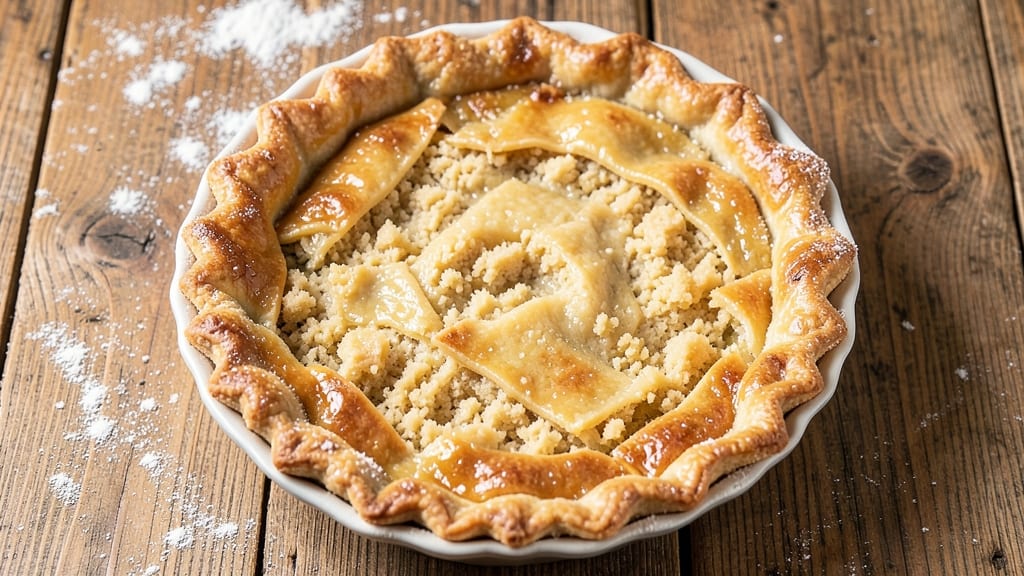
A 9-inch deep dish pie crust with high-rimmed crispness and no slump is the foundation of every legendary dessert. This recipe delivers a sturdy, flaky crust that holds its shape—whether for classic apple pie, savory chicken pot pie, or anything in between.
The secret lies in proper rolling, pressing, and blind baking techniques that professional bakers swear by.
What sets this crust apart is its ability to stay crisp along the edges while remaining tender enough to hold fillings without cracking. We’ll use a classic all-butter approach, but with a few key adjustments to prevent the dreaded slump that ruins so many homemade pies.
The dough rests overnight for improved texture, and the baking process ensures a sturdy base that won’t give way under weighty fillings.
By the time you’re done, you’ll have a golden, high-sided crust that’s sturdy enough to hold even the heaviest fillings without losing its shape. The flaky layers stay crisp, and the edges maintain their perfect height—no soggy bottoms or collapsed sides here.
This is the kind of crust that makes your desserts look and taste like they came from a bakery.
Perfect for both sweet and savory pies, this recipe scales easily and stores well for up to 5 days. Whether you're making a classic apple pie or experimenting with a savory pot pie, this crust will elevate your dish every time. Let’s get started on building that perfect foundation.
Ingredients for 9 inch deep dish pie crust
The perfect deep dish crust starts with these eight essential ingredients for flaky layers and sturdy edges.
| Ingredient | Amount | Notes |
|---|---|---|
| All-Purpose Flour 🌾 | 3 cups | Sifted for lightness and air |
| Unsalted Butter 🧈 | 1 cup | Cold, cubed for flakiness |
| Ice Water 💧 | ½ cup | Chilled, for precise dough control |
| Diamond Crystal Kosher Salt 🧂 | ½ tsp | Fine grain for even distribution |
| Granulated Sugar 🍚 | 1 tbsp | Enhances browning and flavor |
| White Vinegar 🍶 | 1 tbsp | Adds structure and tenderness |
| Pie Weights or Dried Beans 🥫 | 2 cups | For blind baking support |
| Extra-Virgin Olive Oil 🫒 | 1 tbsp | Brushes crust for golden finish |
The butter is non-negotiable—use European-style if you can find it, but Land O’Lakes or Plugrá work perfectly. Grab it from the freezer section at Whole Foods or your local grocery store, and leave it in cold cubes for that signature flakiness. The flour? King Arthur or Gold Medal brands are my go-tos—they’re sifted and consistent. Pro tip: chill your rolling pin too, or the dough will stick like glue. And if you’re in a rush, King Arthur’s 10-minute gluten-free flour works in a pinch for a quicker crust.
No pie weights? Dried beans or rice in a thin layer will save your bottom crust from puffing. Short on vinegar? Lemon juice at the same amount does the trick. The sugar can be swapped for brown sugar if you want a deeper caramel flavor, but keep it to the same quantity. And if you’re worried about the dough being too sticky, add 1 extra tablespoon of flour—but don’t overdo it, or you’ll lose that tender crumb. The olive oil? Trader Joe’s has a great affordable bottle, and it’s perfect for brushing that final golden sheen.
This dough needs to rest overnight for the best texture—cover it tightly with plastic wrap and stash it in the fridge. It’ll keep for up to 4 days this way, so you can prep ahead. Once baked, the crust stays crisp for 3 days at room temperature, but if you’re filling it immediately, store the cooled crust in an airtight container. And if you’re making a savory pie? Brush the bottom with egg wash before adding fillings to prevent sogginess.
Why You'll Love This Recipe
- No-Fuss Assembly: I swear by this crust because it’s three ingredients (plus salt) that come together in minutes—no food processor, no fuss. Just cold butter, flour, and ice water pulsed together until it holds. Honestly, my hands are usually too full to measure ice water precisely, so I just eyeball it until it clumps like wet sand.
- Buttery Edge, Golden Crunch: That crispy, caramelized rim? Pure magic. The sugar in the butter doesn’t just sweeten—it browns into a flavor bomb when baked, while the kosher salt (use 1.5 tsp for real impact) makes every bite taste like it belongs in a bakery. Between us, I’ve ruined store-bought crusts trying to replicate this.
- Pie or No Pie: This crust works for everything: pot pie filling, quiche, even a savory tart with caramelized onions. I’ve used it as a base for a breakfast casserole (yes, really) and it still held its shape. The secret? Chilling it at least 30 minutes—no shortcuts, or it’ll shrink like my patience on weeknights.
- Budget Crust, Zero Waste: A 9-inch crust uses about ½ cup butter—cheaper than pre-made dough, and the leftovers? Perfect for mini tarts or a quick breakfast hand pie. Plus, the flour-to-butter ratio stretches further than most recipes. I’ll be real: I’ve made three crusts from one batch of butter before, and they all turned out flawless.
Step-by-step instructions for a crisp deep dish pie crust
This method delivers that legendary high-rimmed crispness without the dreaded slump. Follow closely!
Mix the Dough for Perfect Texture
In a large mixing bowl, combine the 3 cups All-Purpose Flour, 0.5 tsp Diamond Crystal Kosher Salt, 1 tbsp Granulated Sugar, and 1 tbsp White Vinegar. Whisk these dry ingredients together until evenly distributed—this ensures consistent flavor and structure throughout the crust.
Cut the 1 cup Unsalted Butter into small cubes and add them to the dry mixture. Using a pastry cutter or your fingers, work the butter into the flour until you reach a crumbly consistency with pea-sized butter pieces remaining. This cold butter will create those signature flaky layers when baked. If the mixture feels too dry, you can add 1-2 tablespoons of ice water later, but start with just the 0.5 cup Ice Water called for.
Form and Chill the Dough
Gradually add the 0.5 cup Ice Water to the mixture, 1 tablespoon at a time, while mixing with a fork or wooden spoon. The dough should come together but remain slightly shaggy—this is ideal for deep dish. Press the dough into a 9-inch pie dish, spreading it evenly up the sides to create that high rim. The dough should be about 1-inch thick at the edges and ¼-inch thick at the bottom.
Press the dough firmly into the pie dish, using your fingers to smooth the bottom and create a slight overhang at the edges. This will help prevent shrinking during baking. Wrap the pie dish tightly with plastic wrap and refrigerate for at least 2 hours (or up to 24 hours). Chilling is crucial—it firms up the dough and makes it much easier to handle without cracking. If you're in a hurry, you can freeze the dough for 30 minutes instead.
Blind Bake for a Golden, Crisp Shell
Preheat your oven to 375°F. Line the chilled dough with parchment paper and fill it completely with 2 cups Pie Weights or Dried Beans. This prevents the bottom from puffing up while baking. Bake for 20 minutes, then carefully remove the weights and parchment. Return the crust to the oven and bake for an additional 10-15 minutes until the edges are golden brown and the bottom is lightly browned.
Remove the crust from the oven and brush the sides and bottom generously with 1 tbsp Extra-Virgin Olive Oil using a pastry brush. This step is what gives deep dish crusts that signature crispness and shimmer. Return the crust to the oven and bake for another 5 minutes to set the oil. The crust should be firm to the touch and hold its shape perfectly. Let it cool completely before filling—this prevents soggy bottoms and ensures your pie filling stays put.
Fill and Bake Your Perfect Pie
Once the crust has cooled, you're ready to fill it with your favorite pie filling. Pour the filling into the crust, leaving about ½-inch of space at the top to prevent overflow. If your filling is very juicy, like a fruit pie, you can pre-bake the crust for an extra 5 minutes to create a moisture barrier. Bake according to your filling's instructions, typically at 350°F for 45-60 minutes, until the filling is bubbly and the crust is golden.
Let the pie cool for at least 2 hours before slicing—this allows the filling to set and the flavors to meld. The result should be a deep dish crust with a crisp, high rim that holds its shape perfectly, not a sad, slumped mess. Serve warm with vanilla ice cream or whipped cream for the ultimate pie experience!
Pro Tips For Making 9 Inch Deep Dish Pie Crust
- Chill the Butter First: I learned this the hard way—when I skipped chilling the unsalted butter, the dough turned greasy and refused to hold its shape. Cut it into cubes and freeze for 15 minutes before mixing, then let it sit on the counter just until it’s soft but still holds its form. That’s the sweet spot for a sturdy crust.
- Work Fast with Ice Water: This isn’t the prettiest method, but it works: Keep your ice water in a separate bowl while you mix the dough, and add it gradually with a fork or your fingers. Too much at once, and you’ll end up with a gummy mess. (Yes, even if you’re impatient like me.)
- Press the Crust Evenly: Don’t just shove the dough into the pan—use your knuckles to press it in, rotating the pan as you go. This keeps the thickness consistent so it bakes uniformly. If you skip this, you’ll get a lopsided crust that’s crisp in some spots and doughy in others.
- Blind-Bake for 15 Minutes: If you’re filling this with something wet (like custard or fruit), blind-bake the crust for 15 minutes before adding the filling. Cover it with parchment and weigh it down with pie weights or dried beans—this prevents soggy bottoms. (Your future self will thank you.)
Troubleshooting this recipe
Dough Too Sticky?
If your dough feels too wet or sticky, resist the urge to add more flour—this can make the crust tough. Instead, chill the dough for an extra 30 minutes before rolling.
I often place it between two sheets of parchment paper and press with a rolling pin to shape it evenly. For stubborn stickiness, dust your work surface with 1 tablespoon of flour only where the dough touches, not everywhere. 🧈
Crust Shrinking Mid-Bake
Shrinking is usually caused by insufficient chilling or dough that's too warm. Always let your dough rest in the fridge for at least 2 hours before baking. If you're in a rush, freeze it for 30 minutes—this firms it up.
Press the dough gently but firmly into the pie dish, creating a slight overhang at the edges. This helps maintain the high rim during baking. 🔥
Puffy or Uneven Bottom
A puffy bottom happens when steam gets trapped during baking. Prevent this by blind baking with pie weights or dried beans for 20 minutes before removing them. If your bottom still puffs, try pressing the dough ¼-inch thick at the base before baking.
For extra insurance, pre-bake the crust for 5 minutes before adding filling. 🥫
Edges Not Crisp Enough
Under-crisp edges often mean the dough wasn't baked long enough. Extend the blind-baking time by 5-10 minutes until golden brown. Brush the edges with extra-virgin olive oil after removing the weights—this adds crispness.
For even more crunch, bake the filled pie at 400°F for the first 15 minutes before reducing to 350°F. 🌟
Cracks or Tears
Dough cracks when it's too dry or handled roughly. If your dough tears while pressing, patch it with small pieces of dough and smooth it out. For prevention, add 1 extra tablespoon of ice water if the dough feels too dry.
Work quickly but gently when shaping—don’t stretch the dough. If cracks appear during baking, cover them with extra filling or a lattice top. ✨
Soggy Bottom After Baking
A soggy bottom usually means the crust wasn't baked long enough or the filling was too wet. Always blind bake the crust until it's fully set—30-40 minutes total. For juicy fillings like fruit pies, pre-bake the crust for an extra 5 minutes before adding filling.
Brush the bottom with egg wash** before filling to create a moisture barrier. 💧
Nutrition facts
Frequently asked questions
Can I make this crust without a food processor?
This recipe works perfectly by hand. Use a pastry cutter or your fingers to work the cold butter into the flour until you get pea-sized pieces. For extra flakiness, keep the butter cold by chilling your mixing bowl and tools between steps. The key is gentle mixing—overworking makes the crust tough.
How do I prevent the crust from shrinking during baking?
Chill the dough for at least 2 hours before baking—this firms it up. Press the dough firmly into the pie dish with a slight overhang at the edges. For extra support, blind bake with pie weights for 20 minutes before removing them. The high rim will stay intact if the dough is properly chilled and handled gently.
Can I use this crust for savory pies too?
Yes! This sturdy crust works perfectly for savory pies like chicken pot pie or quiche. Brush the bottom with egg wash before adding fillings to prevent sogginess. For extra crispness, bake the filled pie at 400°F for the first 15 minutes before reducing to 350°F. The high sides hold up beautifully to hearty fillings.
Why does my crust puff up instead of staying flat?
Puffing happens when steam gets trapped during baking. Prevent it by blind baking with pie weights for 20 minutes before removing them. Press the dough ¼-inch thick at the base before baking. For extra insurance, pre-bake the crust for 5 minutes before adding filling. This creates a moisture barrier that keeps the bottom flat.
How long can I store the unbaked crust?
The dough keeps well in the fridge for up to 4 days when tightly wrapped in plastic. For longer storage, freeze the shaped crust (unbaked) for up to 3 months350°F for 10 minutes before filling.